Team Management is the bread and butter of every FIFA player and at the end of the day, is all that matters when playing the game. It forms the core mechanic that drives gameplay and what is seen in a match. So, how do you handle something so crucial for your performance? We have a few simple tips for you that should make Team Management less of a task and more of a strategy to all FIFA players out there. So, let’s begin!
SQUAD
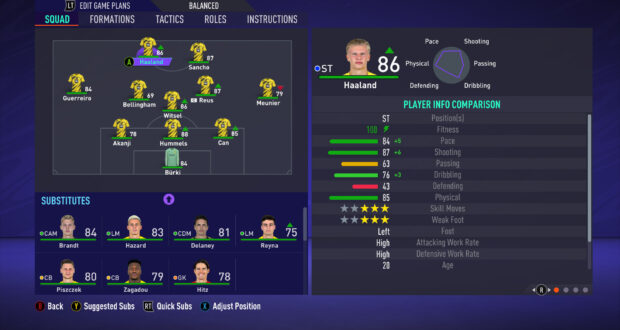
The first screen you see when you enter Team Management, the Squad section allows you to pick your starting line-up, your bench and also look at your reserve players for squad depth. This screen is fairly simple where you look at putting your best (and fit) players into the matchday squad in your preferred formation. There are 2 places to strategize in though, namely the Bench and Game Plans. Your bench can change the match when you use the subs correctly.
While some prefer to keep the default bench and some prefer to remove the keeper to have an extra outfield option, there isn’t really a perfect strategy for the bench. A general rule of thumb is a keeper, 2 defenders, 2 midfielders and 2 forwards on the bench and a keeper, a defender, 2 midfielders and a forward in case of a 5-player bench (mostly cup competitions). As for Game Plans, you can perfectly play the game without changing the defaults and we suggest you only mess around with them after a season or two.
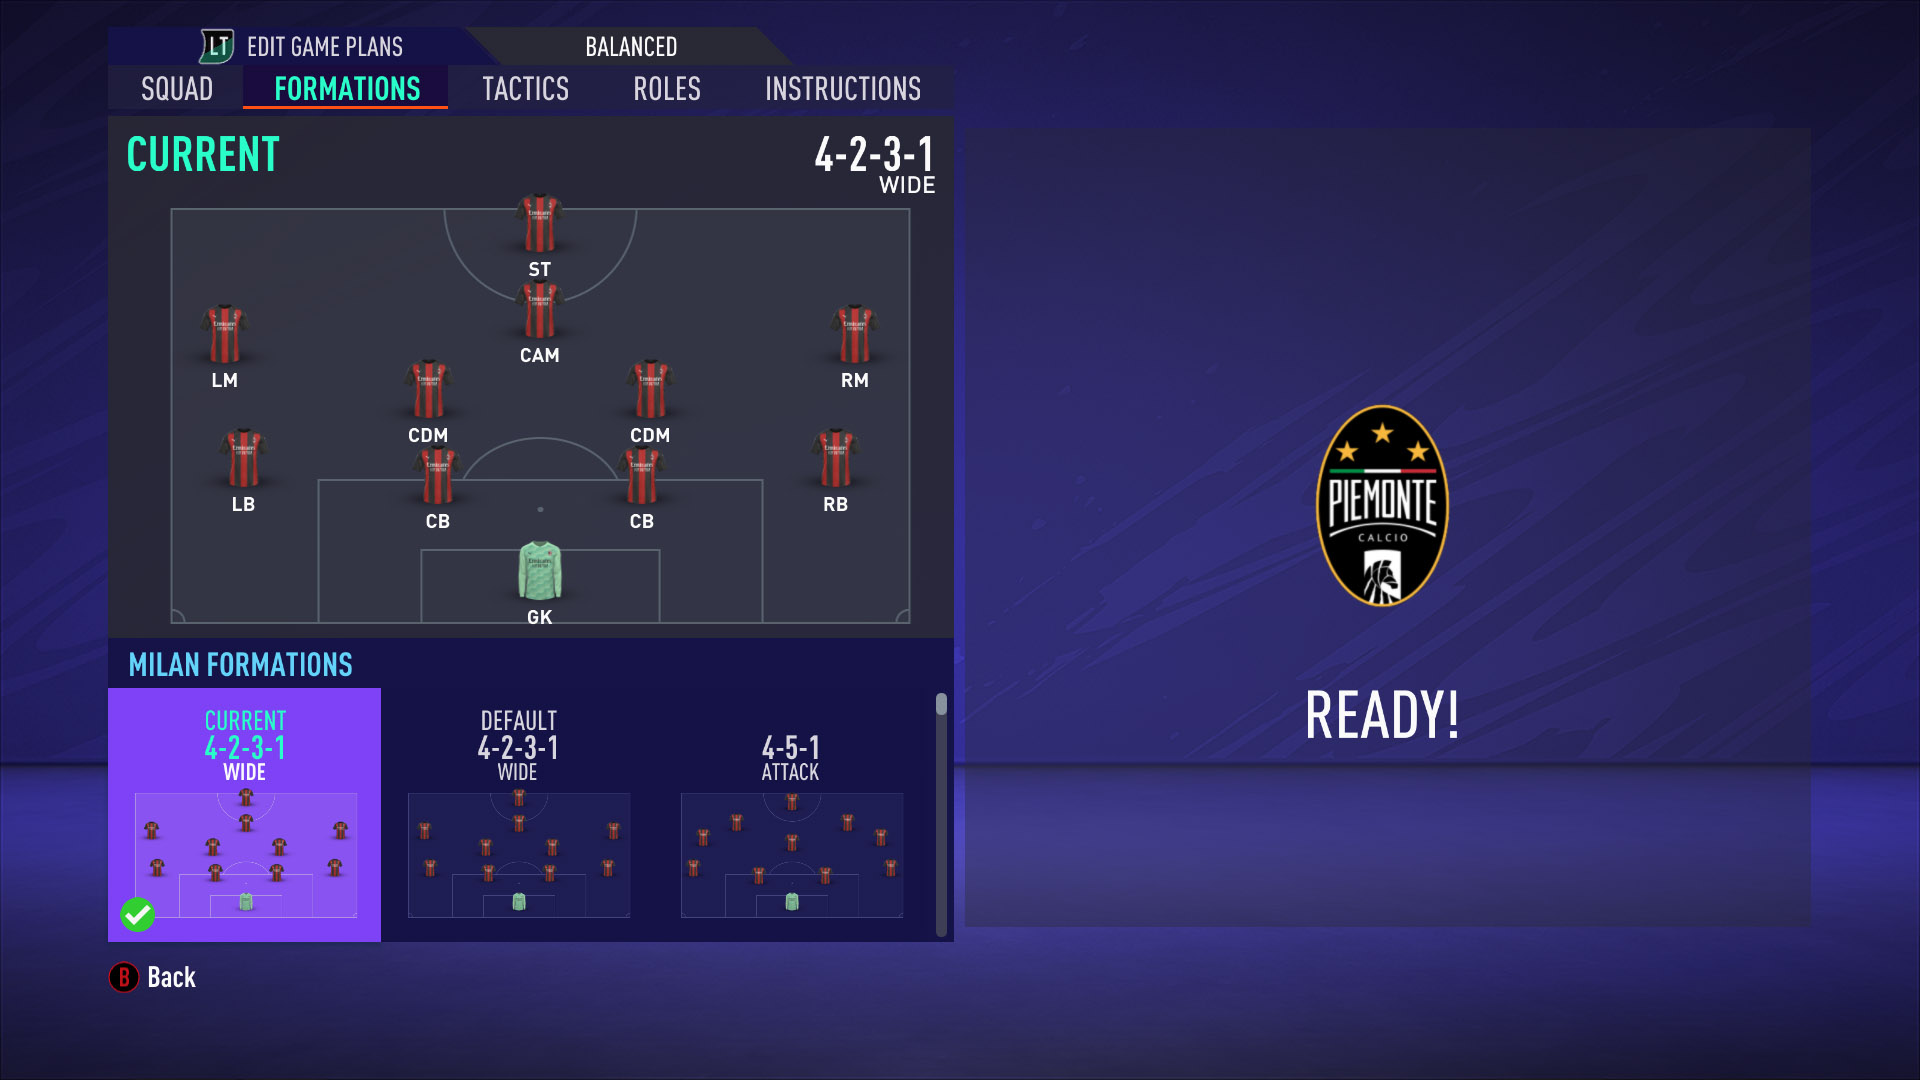
FORMATIONS
This is a fairly simple yet important part of Team Management. Formations dictate how your team positions themselves and how they work with each other. A compact formation promotes possession-based football while a wide formation may favour counter-attacks. A 5-man defence will not let you attack much while a 3-man defence can leave you exposed. As for our recommendation, it is difficult to predict the playstyle of every player. So, it eventually comes down to personal preference and game style. However, our top 3 formations to use are 4-3-3 Holding, 4-4-2 Holding and the reliable 4-2-3-1 Wide.
TACTICS
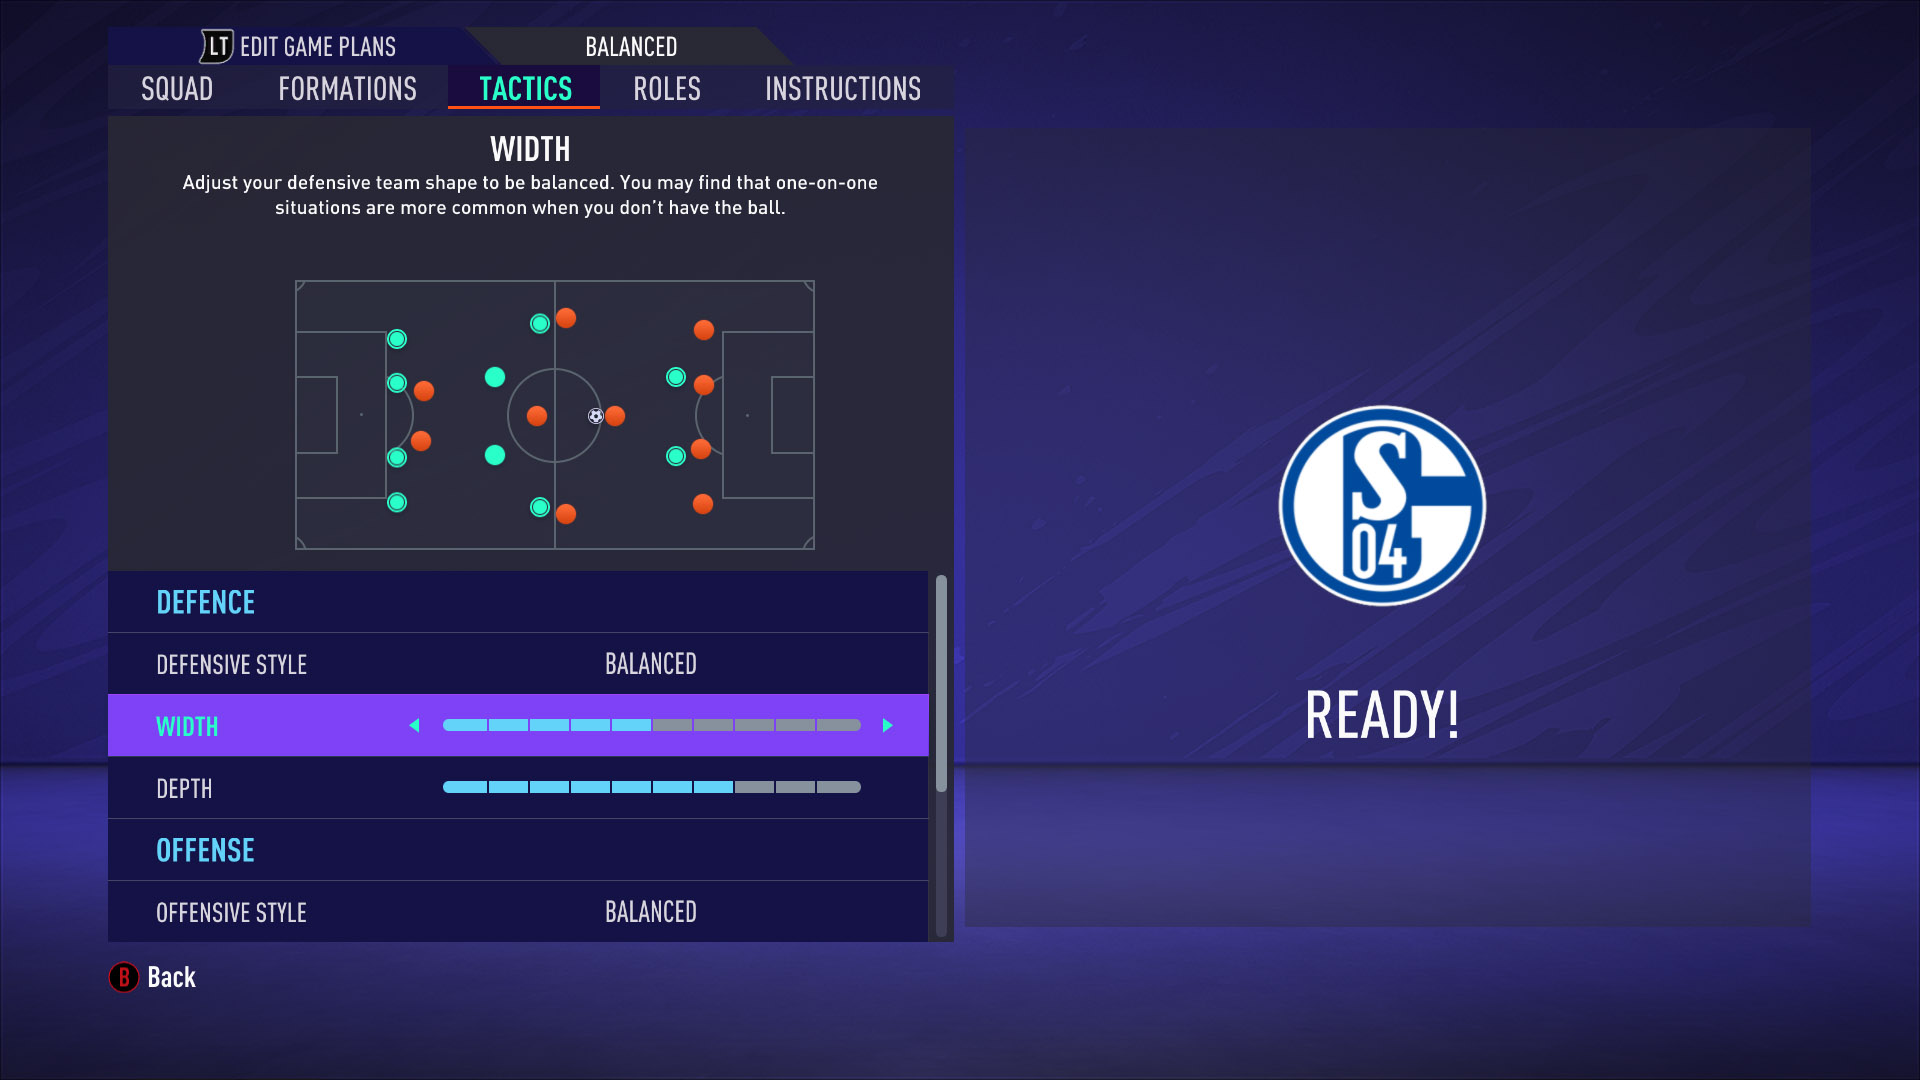
Now, this right here is the trickiest section in Team Management. Confusing to read and difficult to master. But when done right, can be the difference between demolishing your rival or get demolished. Without getting too technical, you can follow a few simple guidelines to set up your tactics easily.
In Defence, use Drop Back and Pressure on Heavy Touch as safer defending tactics at the expense of fewer attacking chances. Pressure After Possession Loss and Constant Pressure may help you get the ball back faster but will drain your players’ stamina very quickly. Width refers to how wide you want your players to play with 1 being central and 10 being at the sidelines. Depth is simply how much vertical movement you want with 1 being “Park the Bus” and 10 being the equivalent of an Offside Trap. If in doubt, you could set your Defence to Balanced.
In Offence, you can choose between Long Ball, Fast Build-Up and Possession with Long Ball being the fastest and riskiest and Possession being the slowest and safest form of attack. If you like to build your chances in the middle of the park, set your width low or set it high if you like playing on the wings. Players in Box is just like Depth and determines how many players come inside the box when creating chances. Corners and Free Kicks follow the same concept. Again, when in doubt, go for Balanced.
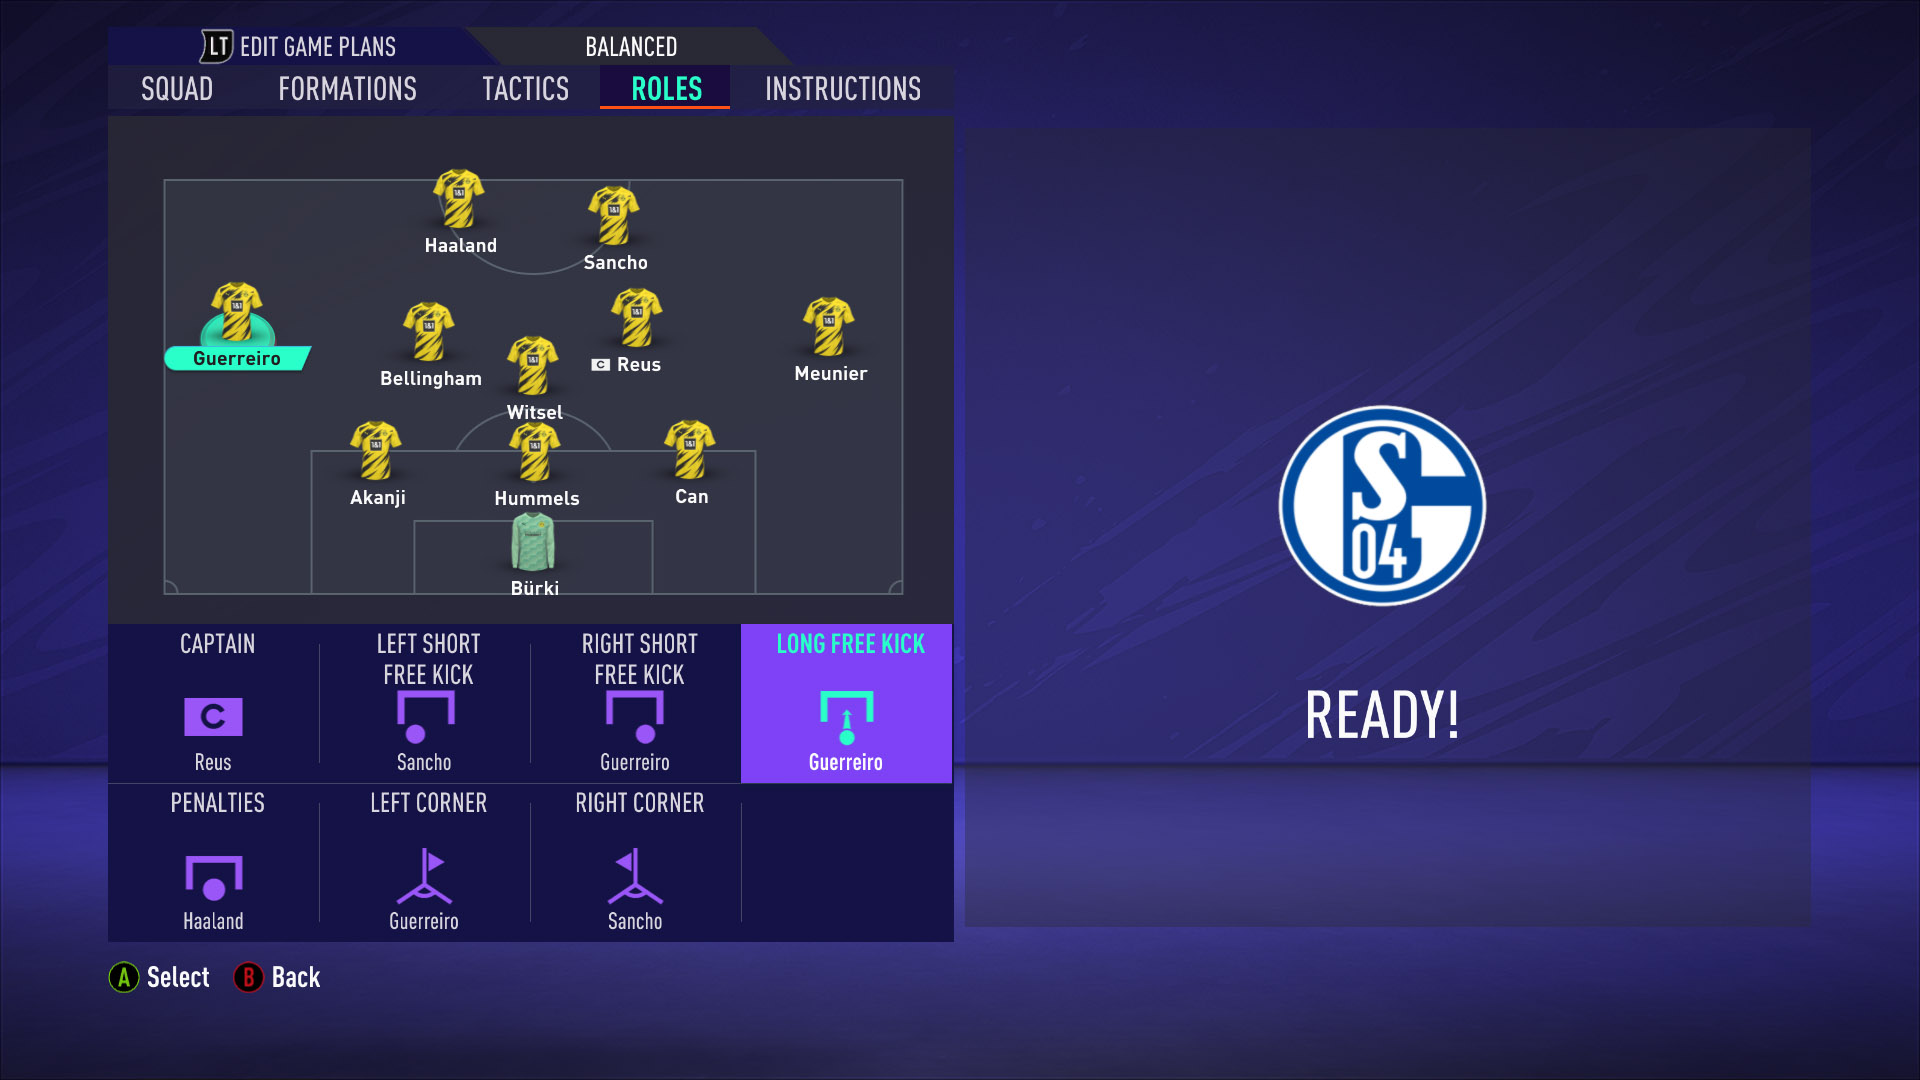
ROLES
Another straight forward section like the Formation tab, Roles simply refer to the captain and set-piece duties. You can select your captain, long and short free-kick takes, corner kick takes and penalty takers. Upon selecting a particular section, you will see the starting line-up and a marker to select the appropriate player. Cycle through the players, looking at the highlighted stats for that particular set piece (e.g. Penalties, Finishing and Shot Power for Penalty Taker).
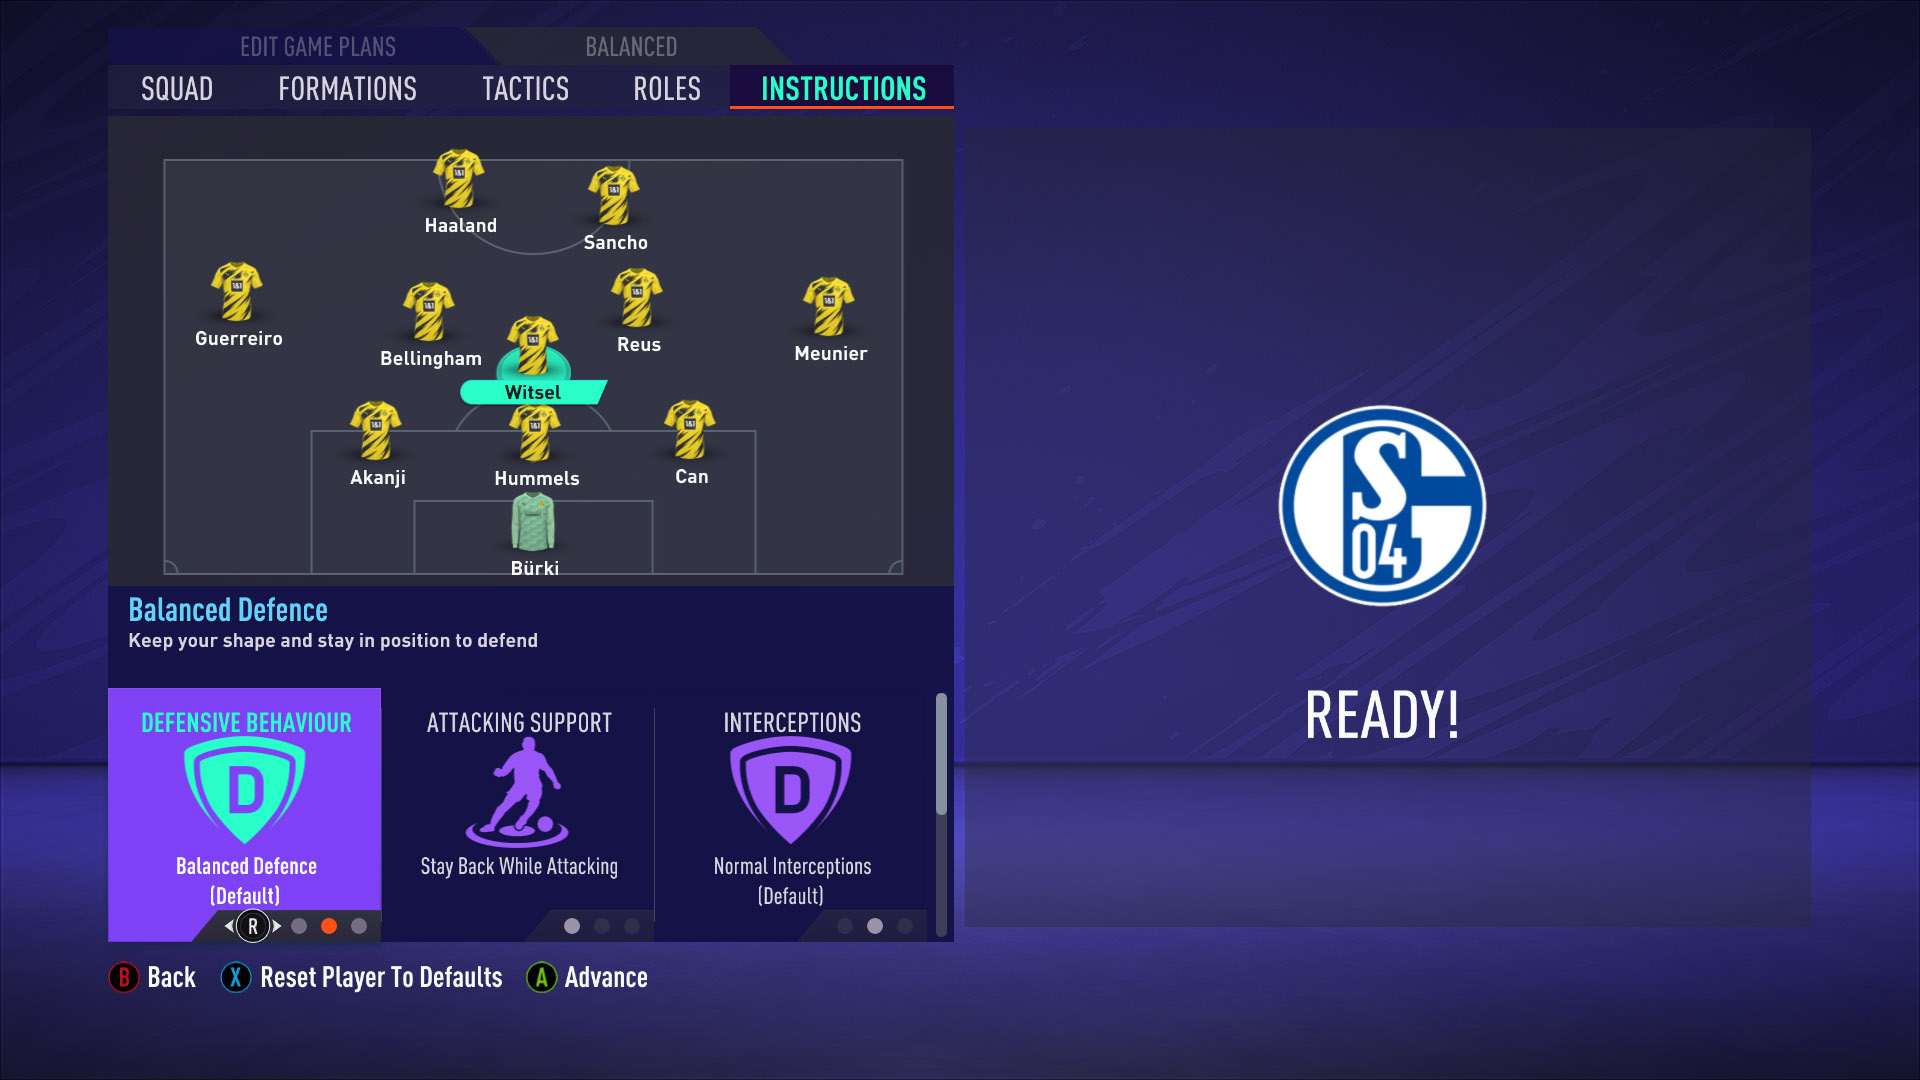
INSTRUCTIONS
The last hurdle in your Team Management course and another tricky one like the Tactics tab. But fret not, it’s not as tricky as Tactics. Instructions are special tactics assigned to a particular player rather than the entire team. Keep in mind that certain instructions only suit players who have the stats to execute them. You can’t expect a slow forward to try and break the Offside Trap with incredible pace or a weak and nimble defender to execute a strength-based instruction.
Attacking Runs are available for full-backs and forwards. Full-backs can be asked to join the attack or stay behind. Forwards can be asked to break the defence line or instead drop back and help create chances. Balanced is the best of both worlds. Attacking Support is available for Centre-backs and Central Midfielders. You can ask them to stay back while attacking, support or even play as a striker when needed. Chance Creation lets Wingers either play hugging the sideline or cut inside and try to score by themselves or even free roam if needed.
Defensive Position makes CMs either cover the wings or the centre of the pitch. Defensive Support is for Strikers and asks them to drop back to help out in defence or stay up and act as a poacher. You can also set interception mentality, Cross support, freedom in positioning and instructions for Support Runs. Lastly, Goalkeeper instructions include how to handle crosses as well as being riskier with the ball and their saves or stick to the traditional methods. As we said, Instructions are not complicated, just a lot of them. Phew!
So, there you have it! Team Management explained in slightly more than a nutshell. But with these tips and descriptions with you, you’ll be confidently able to set your team up with positive tactics and instantly see a difference in your matches. Good luck!